

Stem stitch embroidery is defined as a hand embroidery technique that uses overlapping stitches to create a smooth, twisted, rope-like line. It is one of the top 20 must-know embroidery techniques and appears in professional stitch libraries worldwide. Stitchers prize it for following curves gracefully, making it the go-to choice for floral stems, vines, outlines, and lettering. If you have ever wondered what is a stem stitch embroidery and why so many crafters reach for it first, this guide covers everything from basic technique to creative applications and expert troubleshooting.
What is stem stitch embroidery and how does it work?
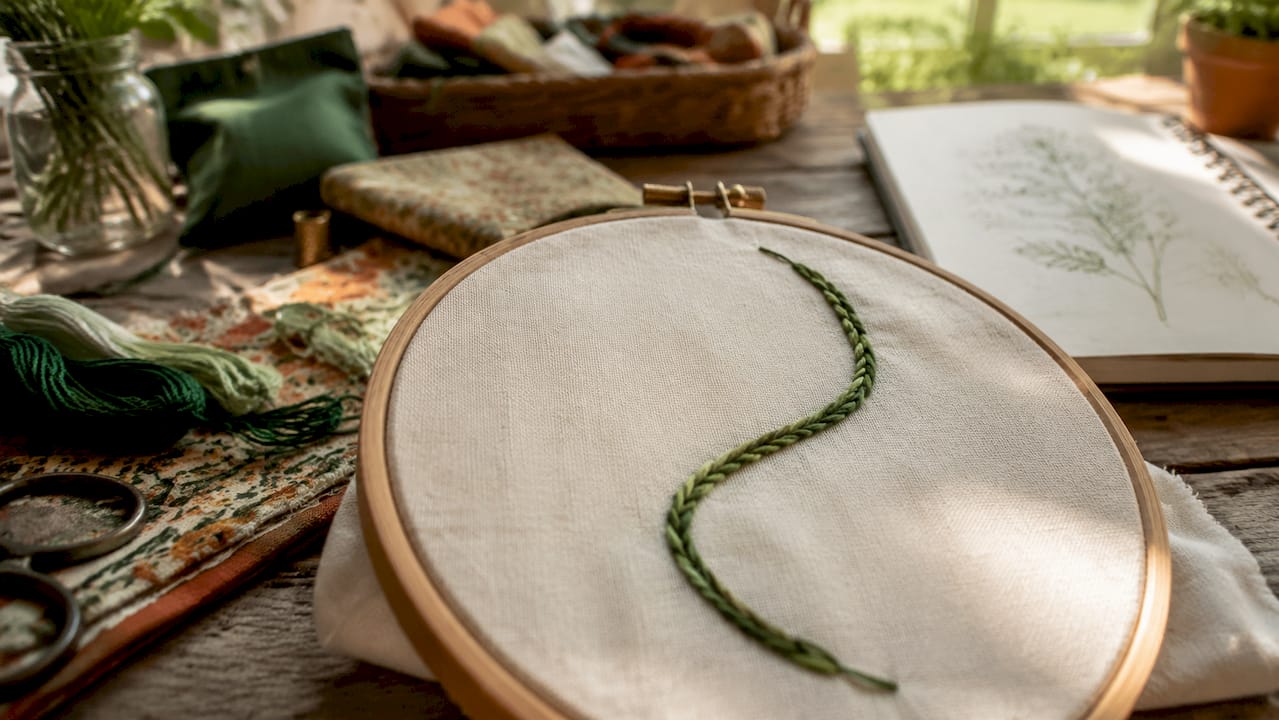
Stem stitch is a foundational outline stitch that produces a raised, twisted line resembling a length of rope. Each new stitch overlaps the tail of the previous one, building a continuous, flowing line. That overlapping structure is what separates it from simpler stitches and gives it its signature texture.
The stitch excels at following curves. Straight lines look clean and intentional, while curved paths stay smooth and rounded rather than jagged. This makes it the natural choice for floral stems, vines, and borders, as well as names, quotes, and monograms where the line needs to bend and flow.
Stem stitch belongs to the broader family of embroidery stitch types that create continuous lines, alongside the outline stitch and the backstitch. Understanding how it differs from those two stitches helps you choose the right tool for each project. That comparison comes later in this guide.
How to do stem stitch: step-by-step technique
Correct execution comes down to one rule above all others: keep your working thread on the same side of the needle for every single stitch. Consistent thread positioning is more important than exact stitch length for achieving a smooth, unified line. Here is how to work the stitch from start to finish.
- Bring the needle up at your starting point (A). Pull the thread through completely.
- Insert the needle about 1/4 inch ahead along your line (B). Do not pull through yet.
- Keep the working thread below the needle. This is the critical step. The thread must sit consistently on one side, below the needle, to build the rope twist.
- Bring the needle up at the midpoint between A and B ©. This is roughly 1/8 inch back from where you inserted it.
- Pull the thread through gently and evenly. You will see the first twisted overlap form.
- Repeat the sequence. Insert the needle 1/4 inch ahead, keep the thread below, and come up at the midpoint of the previous stitch.
Each stitch should measure roughly 1/4 inch long on straight sections. That length gives you a clear, readable twist without looking loose or sloppy. On tight curves, shorten your stitches to about 1/8 inch. Long stitches on curves cause a jagged, pointy appearance that breaks the smooth flow you are working to achieve.
Pro Tip: Mark your line lightly with a water-soluble pen before you start. A visible guide lets you focus entirely on thread placement rather than direction, which speeds up the learning process considerably.
The most common beginner mistake is switching the thread from below the needle to above it mid-stitch. Switching thread position reverses the twist and creates an uneven, inconsistent line. If you notice the rope effect disappearing, stop and check which side your thread is sitting on before continuing.
How does stem stitch compare to outline stitch and backstitch?
The three stitches look similar at a glance, but each produces a distinct result. Knowing the difference helps you pick the right one for your design.
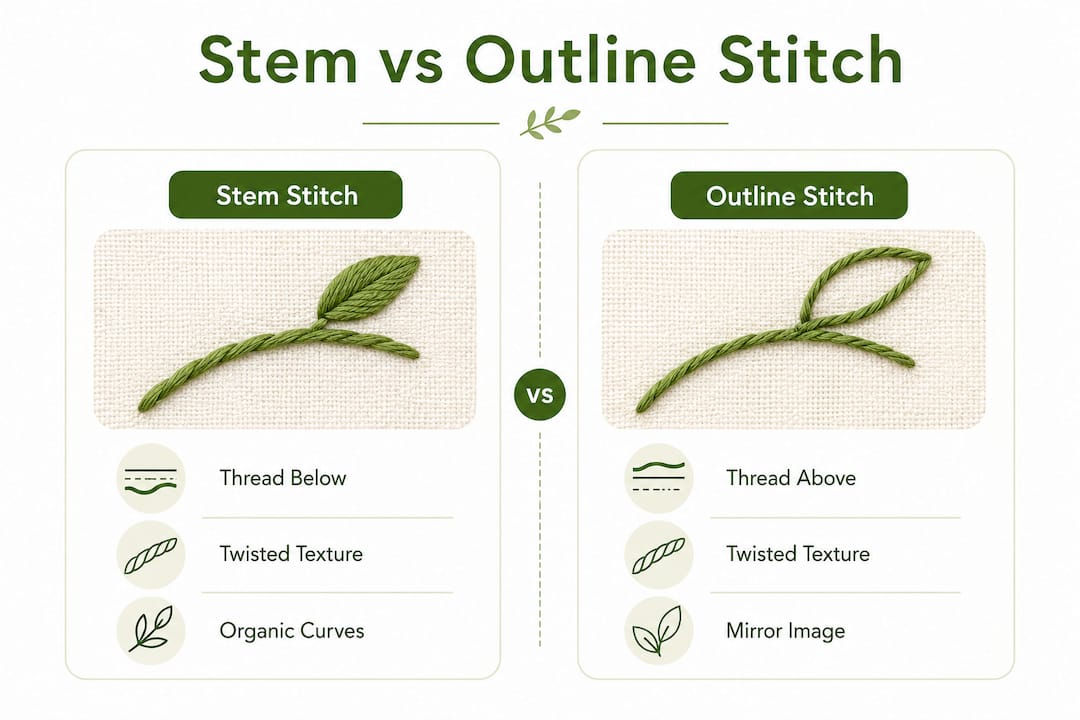
Stem stitch and outline stitch are actually mirror images of each other. The only difference is the position of the working thread. In stem stitch, the thread sits below the needle, creating a rope that twists to the right. In outline stitch, the thread sits above the needle, producing a flatter, slightly smoother line. The visual result is subtle but real, and experienced stitchers choose between them based on the texture they want.
Backstitch creates a flat, solid line with no twist. It looks clean and graphic, which suits geometric shapes and hard edges well. Stem stitch adds a raised, dimensional quality that makes organic shapes like floral stems and vines feel more lifelike. You can also read more about outlining in stitch design to understand when each approach serves a design best.
| Stitch | Thread position | Line texture | Best use |
|---|---|---|---|
| Stem stitch | Below the needle | Raised, rope-like twist | Curves, stems, lettering |
| Outline stitch | Above the needle | Flatter, smoother line | Gentle curves, outlines |
| Backstitch | No overlap | Flat, solid line | Geometric shapes, hard edges |
The table makes the choice clear. When your design calls for organic curves and a little dimension, stem stitch wins. When you need a crisp, flat edge, backstitch is the better call.
Creative ways to use stem stitch in your projects
Stem stitch adds a level of professionalism to simple embroidery by producing a raised line that makes outlines look intentional and sophisticated. That quality opens up a wide range of creative applications beyond basic stems and borders.
Here are the most effective ways to put the stitch to work:
- Floral stems and vines. The stitch follows curves naturally, so winding stems and trailing vines look fluid and realistic.
- Lettering and monograms. The rope-like line gives hand-lettered words a clean, finished look that flat stitches cannot match.
- Borders and frames. Running stem stitch along the edge of a design creates a polished border with visible texture.
- Outlines for filled shapes. Use it to define the edges of satin-stitched petals or leaves, adding depth and separation.
- Nature-inspired designs. Stems, grasses, and branches in nature-inspired stitch designs benefit from the organic flow this stitch provides.
Line thickness is fully customizable without changing the technique itself. Using 6 strands of embroidery floss creates a bold, prominent line that reads well from a distance. Dropping to 1 or 2 strands produces a delicate, fine line suited to detailed work or small-scale designs. That flexibility means one stitch covers everything from chunky statement pieces to intricate miniatures.
Pro Tip: When stitching a tight spiral or circular border, shorten your stitch length to 1/8 inch and slow down. Small, deliberate stitches on curves give you far more control than trying to rush through with longer ones.
Tension matters too. Pull each stitch firmly enough to sit flat against the fabric, but not so tight that the fabric puckers. Consistent tension across the whole line is what separates a polished result from a beginner-looking one.
Troubleshooting and expert advice for mastering stem stitch
The biggest misconception about stem stitch is that it is difficult. Beginners find it rhythmic and relaxing once they master consistent thread placement. That consistency becomes muscle memory after a few projects, and the stitch stops feeling like a technical challenge and starts feeling like a pleasure.
“The mental switch of keeping the thread consistently on one side is the real skill to develop. Once that clicks, the stitch practically works itself. Consistent thread-side placement matters more than perfect stitch length every time.”
— Expert insight from Colonial Needle Creative Ideas Blog
Thread consistency is the single most important variable. If your line looks uneven or the twist keeps disappearing, the cause is almost always an inconsistent thread position rather than a problem with stitch length or tension. Stop, check your thread side, and restart from the last clean stitch.
Stitch length is the second variable to manage. On straight lines, 1/4 inch works well for most fabrics and thread weights. On curves, shortening stitch length to match the tightness of the bend keeps the line smooth. Think of it like steering a car: tighter turns require smaller movements.
Mastering stem stitch also improves your overall embroidery technique. The discipline of maintaining consistent thread placement trains your hands to be more deliberate with every stitch type. Crafters who work through the chain stitch learning curve often find that the same rhythm-building approach applies directly to stem stitch. Practice on a scrap of fabric with a simple curved line before moving to your main project. That small investment of time pays off immediately in cleaner results.
Key Takeaways
Stem stitch is the most versatile outline stitch in hand embroidery, combining a raised rope-like texture with the ability to follow curves, making it ideal for stems, lettering, and borders at any skill level.
| Point | Details |
|---|---|
| Thread position is everything | Keep the working thread below the needle on every stitch to maintain the rope twist. |
| Shorten stitches on curves | Use 1/8-inch stitches on tight curves to prevent jagged, pointy lines. |
| Strand count controls thickness | Use 1–2 strands for fine detail and 6 strands for bold, prominent lines. |
| Stem vs. outline stitch | The only difference is thread position; stem stitch sits below, outline stitch sits above. |
| Practice builds muscle memory | Consistent thread-side placement becomes automatic after a few practice sessions. |
Why stem stitch is worth every minute of practice
I will be honest with you: the first time I tried stem stitch, I kept flipping my thread from below the needle to above it without realizing it. The result looked messy and inconsistent, and I nearly gave up on it. What changed everything was slowing down and watching my thread position on every single stitch rather than focusing on speed.
Once that positioning clicked, the stitch became genuinely enjoyable. There is something satisfying about watching a smooth, rope-like line build across the fabric, especially on a winding floral stem where the curve follows exactly where you want it to go. That raised texture adds a dimension to embroidery that flat stitches simply cannot replicate.
My honest advice is to practice on a piece of scrap fabric with a drawn spiral. A spiral forces you to handle both straight sections and tight curves in one continuous line. If you can stitch a clean spiral, you can stitch anything. Do not skip this step, even if you are an experienced stitcher picking up stem stitch for the first time.
The payoff is real. Stem stitch elevates the quality of any project it touches, from simple floral hoops to detailed lettering pieces. Give yourself permission to practice without pressure, and you will find that this stitch becomes one of your most-reached-for tools.
— Simone
Ready to put your stem stitch skills to work?
Simone Balman Art offers a full set of free tools to help you plan your next embroidery or cross stitch project with confidence. Use the fabric size calculator to get your fabric dimensions right before you cut a single thread.
When you are ready for a new project to stitch, browse the modern cross stitch patterns at Simone Balman Art. The collection includes floral designs, nature themes, and detailed artwork, all with clear charts that make stitching enjoyable from the first stitch to the last. Every pattern is designed with crafters of all skill levels in mind, so whether you are a beginner or a seasoned stitcher, you will find something worth picking up your needle for.
FAQ
What is a stem stitch in embroidery?
Stem stitch is a hand embroidery technique that uses overlapping stitches to create a raised, rope-like line. It is classified as a foundational outline stitch and is widely used for floral stems, curves, and lettering.
Which side does the thread go on for stem stitch?
The working thread sits below the needle for every stitch. Keeping it consistently on that side creates the rope twist that defines the stitch.
How long should stem stitch stitches be?
On straight lines, aim for roughly 1/4 inch per stitch. On tight curves, shorten to about 1/8 inch to keep the line smooth and prevent jagged edges.
What is the difference between stem stitch and outline stitch?
The only difference is thread position. Stem stitch keeps the thread below the needle, producing a right-twisting rope line. Outline stitch keeps the thread above the needle, creating a flatter, smoother line.
Is stem stitch good for beginners?
Yes. Stem stitch becomes rhythmic and relaxing once you master consistent thread placement. Most beginners find the technique clicks after a short practice session on scrap fabric.


