

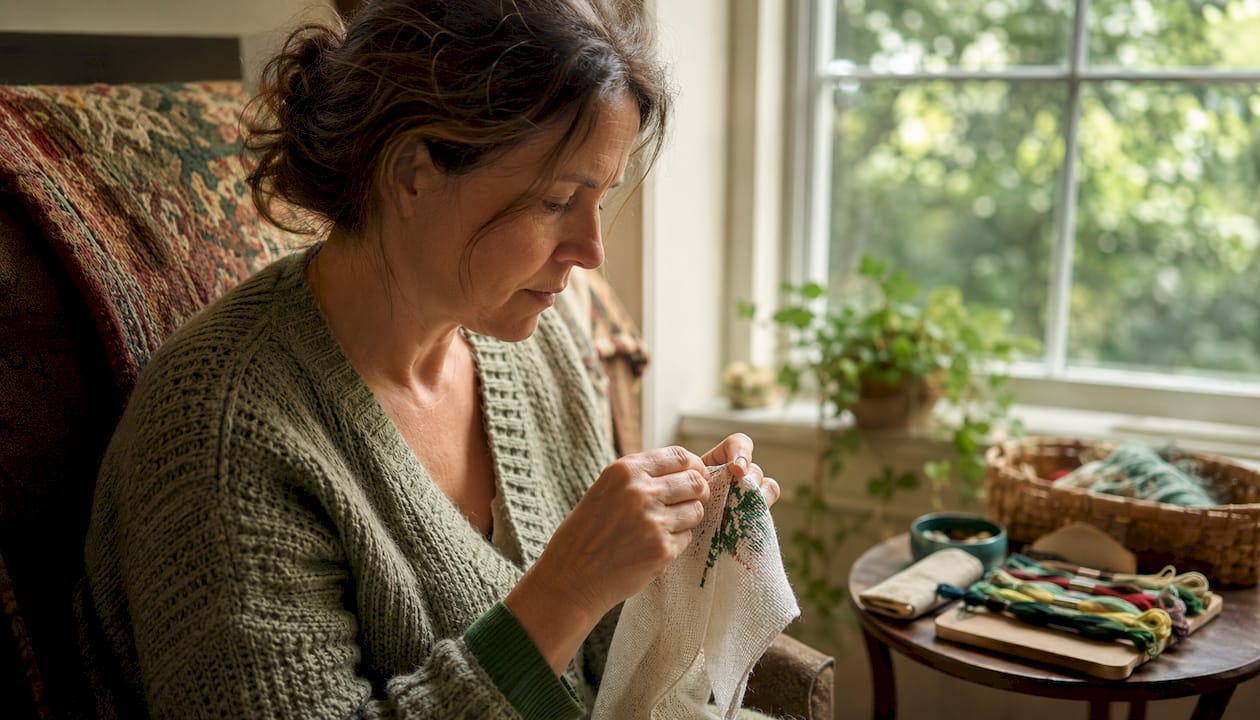
The cross stitch without hoop method is defined as stitching fabric held directly in your hands rather than stretched across a frame or hoop. This approach gives you complete portability, a closer feel for the fabric, and zero risk of hoop marks on delicate material. It suits crafters who want to stitch on the go, work on small projects, or simply enjoy a more tactile connection to their craft. Simone Balman Art recommends this method especially for projects under 3 inches wide, where in-hand control is both practical and rewarding.
What is the cross stitch without hoop method?
The cross stitch without hoop method, sometimes called handheld cross stitch or in-hand stitching, is a recognized alternative to frame-based embroidery. The standard industry term for the broader practice is “in-hand embroidery,” and it has been used by needleworkers for centuries before hoops became common. You hold the fabric between your fingers, apply gentle tension with your non-dominant hand, and stitch with your dominant hand. No additional equipment is required beyond a needle, floss, and fabric.
In-hand stitching encourages a direct tactile connection with the fabric, favored by crafters who want a deeper, more intuitive experience. That physical feedback actually helps you read the fabric better and adjust your tension naturally as you go. Many stitchers who switch to this approach report that it feels more personal and less mechanical than working with a rigid frame.
What tools and fabric work best for no-hoop cross stitch?
The right materials make in-hand stitching much easier and more enjoyable. You do not need a long list of supplies, but a few specific choices will set you up for success.
Must-have tools:
- Tapestry needles (size 24 or 26 for standard Aida cloth)
- Six-strand cotton embroidery floss, separated to 2 strands for most projects
- Small fabric clips or a rubber band to roll and hold the fabric edge
- A needle minder to keep your needle secure between stitches
- Sharp embroidery scissors for clean thread cuts
Fabric choice is the single biggest factor in how easy your hoopless stitching feels. Fabric choice greatly impacts ease of hoopless stitching, and stiffer fabrics are far easier to manage without a frame. Here is a quick comparison:
| Fabric type | Count range | Suitability for in-hand stitching |
|---|---|---|
| Aida cloth | 14–18 count | Excellent. Stiff weave holds shape naturally in hand. |
| Evenweave linen | 28–32 count | Good. Requires more careful hand support. |
| Jobelan/evenweave | 28 count | Moderate. Softer feel; roll edges for stability. |
| Soft linen | 36+ count | Challenging. Best reserved for experienced stitchers. |
Aida cloth is the clear winner for beginners trying no-hoop cross stitch for the first time. Its open weave and stiff texture give you a natural grid to follow without any frame holding it taut. Finer fabrics like high-count linen require more deliberate hand support, so save those for when you have built up your in-hand confidence.
Pro Tip: Cut your fabric at least 2 inches larger than your design on all sides. That extra border gives your fingers something to grip without crowding the stitching area.
How do you cross stitch successfully without a hoop?
Technique is everything when you stitch without a frame. The good news is that correct technique can yield professional results without a hoop, and the steps below will get you there.
Setting up your fabric
- Press your fabric flat with an iron before you begin. Creases make in-hand tension harder to manage.
- Fold the raw edges under or use a small piece of masking tape along each edge to prevent fraying while you work.
- Find your center point and mark it lightly with a water-soluble pen. This keeps your design positioned correctly as you hold the fabric.
- Roll the excess fabric loosely around your non-dominant hand, leaving only the working area exposed. Secure the roll with a fabric clip or rubber band.
Starting your thread
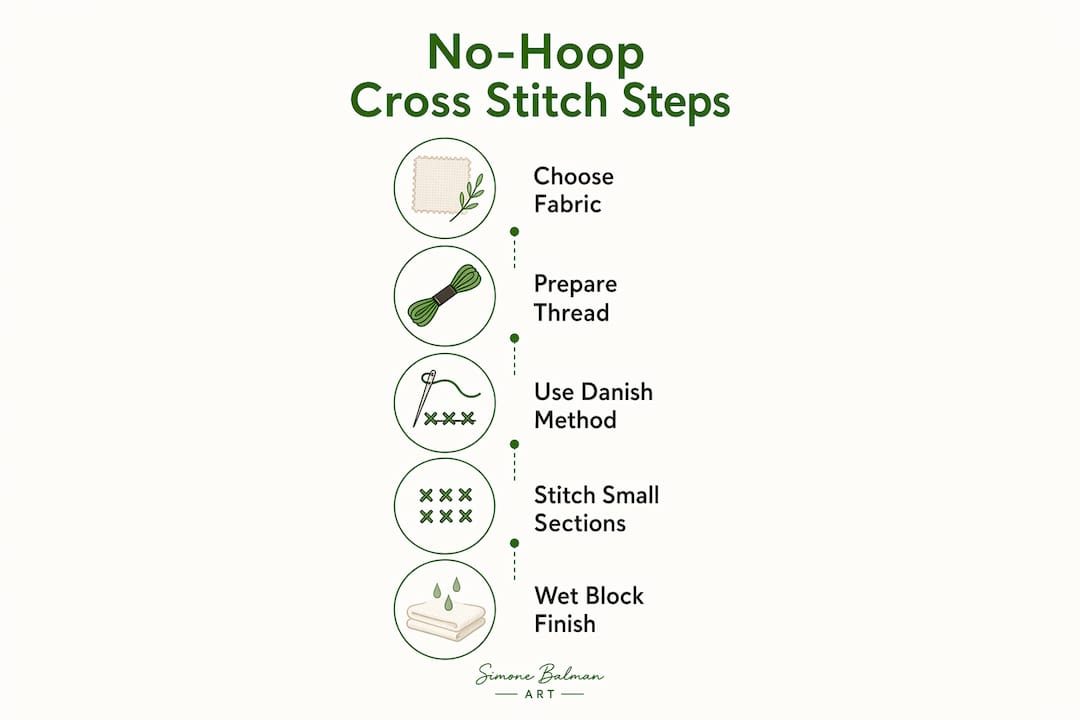
Use the loop start method for a clean, secure beginning. Cut a single strand of floss twice your normal working length. Fold it in half to create a loop at one end. Thread the two cut ends through your needle. Bring the needle up through the fabric, then pass it through the loop on the back before pulling tight. This anchors the thread without a knot and keeps the back of your work tidy.
Stitching in hand: the Danish Method
The Danish Method is more effective without a hoop, allowing fluid needle movement and efficient long passes across rows. Here is how it works:
- Stitch all the bottom-left-to-top-right diagonal stitches across a row first, moving from left to right.
- Return from right to left, completing each cross with the top-left-to-bottom-right diagonal.
- Reposition the fabric in your hand naturally as the needle moves. Do not grip tightly. Let the fabric flex.
- Park threads by leaving your needle in the fabric when switching colors, rather than cutting and restarting.
- Finish each thread by weaving it under 4–5 stitches on the back, then trim close to the fabric.
Keeping fabric flexible in hand instead of gripping tightly leads to more natural, even stitches. That single habit separates tidy in-hand work from puckered, uneven results.
Pro Tip: Work in sections no larger than 2 inches at a time. Stitch that section, then roll the fabric to expose the next area. This keeps your working zone consistent and your tension even throughout the project.
What are the common challenges with hoopless cross stitch?
Stitching without a frame introduces a few challenges that are easy to solve once you know what to watch for.
Fabric puckering is the most common issue. It happens when you pull thread too tight or grip the fabric too firmly. The fix is simple: allow the fabric to breathe in your hand. Allowing fabric to flex prevents distortion better than tightening fabric excessively in a hoop.
Uneven tension across rows shows up as stitches that look different sizes or angles. Slow down and check your pull force after every few stitches until consistency becomes muscle memory.
Hand fatigue is real, especially for new stitchers. Take a break every 20–30 minutes. Stretch your fingers and wrists. Holding fabric without a rigid support uses small muscles that need time to build endurance.
Here are the most useful troubleshooting tips to keep in your back pocket:
- Blocking: Blocking evens out tension inconsistencies that arise during hoopless stitching. Dampen your finished piece, pin it square on a foam board, and let it dry fully. This single finishing step corrects most minor distortion. You can find a full list of finishing options for stitchers to use after blocking.
- Hoop marks: Hoop marks on delicate fabrics are fully avoided by stitching in hand, which preserves fabric integrity. This is a genuine advantage over frame-based stitching, especially on premium linen.
- Fabric rolling: If your fabric keeps shifting, roll more of it around your non-dominant hand and grip the roll, not the working area.
- Thread tangling: Work with shorter thread lengths, around 18 inches, to reduce tangling when the fabric moves freely in your hand.
Pro Tip: If your stitches look uneven after finishing, do not panic. Wet blocking almost always fixes the problem. Pin the piece to a clean towel, mist it lightly with water, and let it air dry flat overnight.
When should you choose no-hoop versus using a hoop?
Both approaches have a place in your stitching practice. The key is matching the method to the project.
Projects under 3 inches are the most manageable size for in-hand techniques. Small ornaments, bookmarks, bag charms, and mini portraits are all ideal candidates for hoopless work. Larger designs with many color changes benefit from the stability a hoop provides.
| Factor | No-hoop method | Hoop method |
|---|---|---|
| Project size | Best under 3 inches wide | Works well at any size |
| Portability | Excellent. No extra equipment needed. | Limited. Hoop adds bulk. |
| Fabric marks | None | Risk of hoop marks on delicate fabric |
| Tension control | Requires practice | Easier for beginners |
| Speed | Faster with Danish Method | Slower due to frame repositioning |
| Best for | Small, portable, or delicate projects | Large, complex, or beginner projects |
The no-hoop approach suits experienced stitchers who want speed and portability. Beginners often find a hoop helpful while they build stitch consistency. That said, in-hand cross stitch can produce neat, consistent results comparable to hoop use when the technique is solid. Try both and see which feels right for each project. You can also explore pattern bundle options to find small designs that work perfectly for in-hand practice.
Key Takeaways
The cross stitch without hoop method produces professional results when you choose stiff fabric, use the Danish Method, and finish with blocking to correct any tension variation.
| Point | Details |
|---|---|
| Best project size | Keep designs under 3 inches wide for the easiest in-hand control. |
| Fabric choice matters | Aida cloth is the most forgiving fabric for hoopless stitching. |
| Danish Method advantage | Stitching long row passes in hand is faster and more fluid than with a hoop. |
| Blocking is non-negotiable | Always block your finished piece to correct minor tension inconsistencies. |
| No hoop marks | In-hand stitching fully protects delicate fabrics from frame damage. |
Why I love stitching without a hoop
I came to in-hand stitching out of necessity. I wanted to stitch on a long flight, and dragging a hoop through airport security felt like more trouble than it was worth. What I discovered surprised me. Without the hoop, I felt every thread pull, every fabric shift. My hands started reading the fabric in a way they never had before.
That tactile feedback genuinely improved my stitch consistency. When you hold the fabric, you feel immediately when a stitch is too tight. A hoop hides that feedback behind rigid tension. In-hand stitching makes it obvious, and that forces you to correct it in real time.
My favorite projects for this method are small animal designs and floral motifs, the kind of compact, detailed work where portability and intimacy with the fabric matter most. I also love that my finished pieces come off the work with no hoop marks to steam out. On premium linen, that alone is worth the learning curve.
If you are hesitant, start with a 14-count Aida piece and a simple 2-inch design. Give yourself three or four sessions to get comfortable with the grip and the Danish Method passes. The learning curve is shorter than you expect, and the freedom you gain is genuinely satisfying.
— Simone
Patterns and tools for your no-hoop projects
Simone Balman Art has everything you need to get started with in-hand stitching right away.
Use the free fabric size calculator to plan exactly how much Aida or linen you need for any project, so you always have the right amount of border fabric to grip comfortably. For design inspiration, the Mini Baby Animals Pattern Bundle is a perfect fit for the no-hoop method. Every design in the bundle is compact, charming, and sized for comfortable in-hand stitching. All patterns from Simone Balman Art include clear charts and full color keys, so you can focus on enjoying the stitch rather than decoding the design.
FAQ
Can you cross stitch without a hoop as a beginner?
Yes. Beginners can stitch without a hoop by starting with 14-count Aida cloth and keeping designs under 3 inches wide for easier fabric control.
Does hoopless cross stitch look as neat as hoop stitching?
Skilled stitchers confirm that in-hand stitching produces results comparable to hoop use. Blocking after finishing corrects any minor tension differences.
What is the Danish Method in cross stitch?
The Danish Method is a technique where you stitch all bottom diagonal passes across a row first, then return to complete each cross. It works especially well without a hoop because the fabric can be repositioned naturally by hand.
How do you fix puckering when stitching without a hoop?
Wet block your finished piece by dampening it, pinning it square on a flat surface, and letting it dry fully. Blocking corrects tension fluctuations that cause puckering in hoopless work.
What size projects work best for in-hand cross stitch?
Projects under 3 inches wide are the most manageable for in-hand techniques. Larger designs benefit from the added stability of a hoop or scroll frame.


