

Cross stitch ornaments are small, stitched decorative pieces designed for hanging on trees, gifting, or displaying as part of a seasonal collection. The best cross stitch ornament examples range from miniature designs around 1 inch to standard sizes of 2.25–3.25 inches, with finishing techniques spanning simple hoop framing to flat-finish mounting board methods. Whether you are a beginner reaching for your first festive motif or an experienced stitcher building a coordinated collection, the variety of styles, sizes, and finishes makes this craft endlessly rewarding.
1. Popular cross stitch ornament examples and what makes them work
The most beloved handmade cross stitch ornaments share a few things in common: a clear, readable motif, a size that fits comfortably in the hand, and a finish that looks intentional. Here are five standout styles worth knowing.
- Holiday character ornaments (Santa, snowmen, reindeer): These classic festive cross stitch designs work best on 28 or 32-count evenweave fabric. The higher count keeps fine details crisp at small sizes.
- Animal circle ornaments: Round designs featuring animals like penguins or rabbits fit naturally into a 3.25-inch circle template on 32-count fabric. The circular format gives a polished, uniform look across a whole set.
- Seasonal icon ornaments (trees, stars, snowflakes): These suit beginners because the shapes are geometric and forgiving. A flat-finish with mounting board gives them a professional edge.
- Gift-themed ornaments (candy canes, wrapped presents): Small and quick to stitch, these make excellent cross stitch gift ideas. They finish well in a purchased hoop or a simple fabric frame.
- ✨ Winter scene ornaments: Designs with snowy landscapes or cozy cottages benefit from darker neutral fabric. Always verify that light floss colors stand out adequately before you begin stitching on a darker ground.
Pro Tip: When building a collection, choose one fabric count and one circle template size for every ornament. Consistent sizing makes the whole set look intentional when displayed together.
2. How to finish a cross stitch ornament
Finishing is where a stitched piece becomes a real ornament. The method you choose affects the look, durability, and time investment of your finished piece.
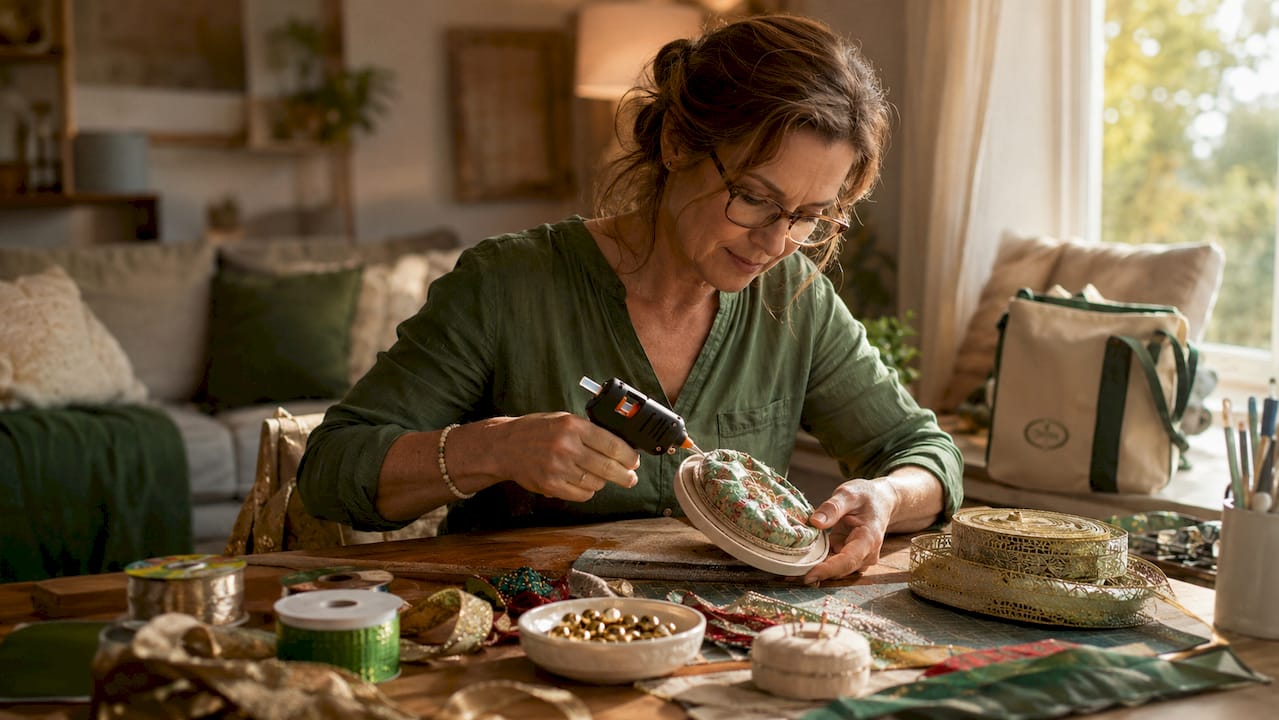
- Gather your supplies. Basic finishing supplies include cardboard or foam core backing, hot glue, scissors, a ruler, a pencil, and decorative trims like rickrack or metallic cord.
- Trim your stitchery. Cut the fabric evenly around the design, leaving about 1 inch of fabric border. Consistent trimming makes the next steps much easier.
- Cut your backing. Trace your circle or shape template onto cardboard and cut it out cleanly. This backing gives the ornament its firm, flat shape.
- Glue the fabric to the backing. Apply hot glue around the edge of the cardboard. Pull the fabric taut and press it down firmly, folding the edges neatly to the back.
- Attach a hanging loop. A metallic cord loop glued to the top back of the ornament is the simplest option. It holds well and looks neat.
- Cover the edges. Glue a decorative trim, such as gold rickrack or velvet ribbon, around the perimeter. This hides raw edges and adds a finished, gift-ready look.
- Add embellishments last. Attach any bows, jingle bells, or beads after the base is fully dry to avoid shifting during assembly.
For a more polished result, the fabric framing method uses a sewn fabric back instead of exposed cardboard. You cut a matching fabric circle, fold the edges under, and slip stitch it to the back of the ornament. This technique takes more time but produces a professional, uniform finish that experienced stitchers prefer for display collections.
Pro Tip: Use a 3/8-inch metallic ribbon bow at the top of the ornament and keep jingle bells to 1/2 inch or smaller. Oversized embellishments compete with the stitching and throw off the proportion.
3. Creative cross stitch decoration ideas to personalize your ornaments
Personalization is what turns a nice ornament into a memorable one. Small choices in color, trim, and embellishment add up to a piece that feels truly handmade.
- Choose contrasting floss and fabric. Dark fabric with light floss creates high visual impact. Always verify contrast before you start stitching, especially on darker winter-themed fabrics.
- Use thread conversions freely. DMC equivalents let you work with floss you already own without sacrificing design quality. Swapping a color slightly warmer or cooler can make the design feel more personal.
- Scale embellishments to the ornament. A 3/8-inch ribbon bow and a 1/2-inch jingle bell are sized to maintain proportion on small ornament designs. Larger trims overwhelm the stitching.
- Mix motifs within a theme. Combine a holiday truck, a penguin, and a candy cane in one set using the same fabric count and finishing size. The variety keeps things interesting while the consistent format holds the collection together.
- Add beads for texture. A single seed bead stitched as a berry or a star adds dimension without bulk. This works especially well on nature-inspired and floral ornament designs.
Pro Tip: If you are adapting a larger pattern for an ornament, reduce the stitch count by working on a higher fabric count rather than shrinking the design on paper. The result is cleaner and easier to stitch.
4. Finishing methods compared: which one fits your project?
Choosing the right finishing method depends on your skill level, the time you have, and the look you want. The table below breaks down the most common options.
| Finishing method | Materials needed | Skill level | Appearance | Time investment |
|---|---|---|---|---|
| Hot glue with cardboard backing | Cardboard, hot glue, trims, cord | Beginner | Casual, charming | Low (under 30 minutes) |
| Fabric frame with sewn back | Matching fabric, needle, thread | Intermediate | Polished, gift-ready | Medium (30–60 minutes) |
| Mounted in a purchased hoop | Wooden or plastic hoop | Beginner | Rustic, handmade | Very low (under 15 minutes) |
| Flat-finish with mounting board | Foam core, circle template, trims | Intermediate to advanced | Professional, uniform | Medium to high |
The hot glue method is the best starting point for beginners. It uses easy-to-find craft supplies and produces a charming result quickly. The flat-finish mounting board method suits stitchers who want a coordinated collection with a consistent, professional look. Purchased hoops work well for rustic or farmhouse-style displays where the raw, handmade quality is part of the appeal.
For a deeper look at all your options, the finishing techniques guide at Simone Balman Art covers methods for every skill level in clear, practical detail.
Key takeaways
The most successful cross stitch ornaments combine a consistent size standard, a finishing method matched to your skill level, and embellishments scaled to the design.
| Point | Details |
|---|---|
| Size consistency matters | Use one circle template size across a collection so ornaments coordinate visually on display. |
| Match finishing to skill level | Beginners do well with hot glue and cardboard; advanced stitchers get better results with flat-finish mounting board. |
| Scale embellishments carefully | Keep ribbon bows at 3/8 inch and jingle bells at 1/2 inch to avoid overwhelming small designs. |
| Verify fabric and floss contrast | Always test light floss against dark fabric before stitching to confirm the design reads clearly. |
| Thread conversions add flexibility | Using DMC equivalents lets you work with your existing floss stash without changing the design quality. |
What I have learned from years of making ornament collections
Ornament-making taught me something I did not expect: the finish matters as much as the stitching. I spent years focusing almost entirely on the design and treating the finishing as an afterthought. The result was a collection that looked inconsistent, even when the stitching itself was good. Once I committed to a single circle template size and one finishing method per collection, everything clicked. The ornaments looked like they belonged together.
My honest preference is the flat-finish mounting board method. It takes longer, but the result is firm, flat, and clean. When you hang a set of ornaments finished this way, they sit beautifully on the tree without curling or flopping. That said, I reach for the hot glue method when I want to finish something quickly or make a batch of gifts. Both have a place.
The detail most stitchers overlook is fabric and floss contrast. I have seen beautiful designs disappear into the background because the stitcher chose a fabric that was too close in value to the floss. Always hold your floss against the fabric in natural light before you start. It takes thirty seconds and saves hours of regret.
One last thing: share your finished ornaments. The cross stitch community is warm and genuinely enthusiastic. Posting your work, even imperfect pieces, encourages other stitchers and often brings back ideas and feedback that improve your next project. The Christmas Truck pattern from Simone Balman Art, for example, generates wonderful community responses every holiday season.
— Simone
Simone Balman Art patterns and tools for ornament projects
Planning an ornament project is much easier when you have the right tools from the start. Simone Balman Art offers a free fabric size calculator that helps you work out exactly how much fabric you need for any ornament size, so you never cut too small or waste material.
The Simone Balman Art pattern collection includes seasonal designs, animal motifs, and nature-inspired artwork that adapt beautifully to ornament formats. Each pattern comes with clear charts and color guidance, making it straightforward to scale designs to your chosen ornament size. Whether you prefer digital PDF downloads or printed pattern books, there is a format that fits how you like to stitch.
FAQ
What size should a cross stitch ornament be?
Cross stitch ornaments typically range from miniature sizes around 1 inch to standard sizes of 2.25–3.25 inches. Professional ornament sets often use a 3.25-inch circle template on 32-count fabric for a consistent, coordinated finish.
What fabric count works best for small ornaments?
28-count or 32-count evenweave fabric works best for ornaments because the higher count keeps fine details readable at small sizes. Higher counts also allow more design complexity within a limited stitching area.
How do I finish a cross stitch ornament as a beginner?
The simplest method uses cardboard backing, hot glue, and decorative trim. Cut your fabric evenly, glue it to the cardboard, attach a cord loop, and cover the edges with rickrack or ribbon for a clean, gift-ready result.
Can I adapt a large cross stitch pattern into an ornament?
Yes. Work the design on a higher fabric count rather than reducing the pattern on paper. This keeps the stitches clean and the design readable at a smaller finished size.
What embellishments work well on cross stitch ornaments?
Small-scale trims work best. A 3/8-inch ribbon bow and a 1/2-inch jingle bell maintain proportion on standard ornament sizes without competing with the stitching itself.


