

Cross stitch framing is the process of mounting and displaying your finished stitched artwork using methods that protect the fabric, preserve the threads, and complement your home décor. The main options include lacing, hinging, pinning, matting, and various glazing choices, each suited to different project sizes, styles, and preservation goals. Whether you’ve just finished your first small floral piece or a large heirloom sampler, choosing the right framing method makes a real difference to how your work looks and how long it lasts. This guide has all the cross stitch framing options explained clearly, so you can make a confident choice for every project you complete.
What are the principal mounting techniques for cross stitch framing?
Mounting is the foundation of any good framing job. It determines how your fabric sits behind the glass, how much tension the threads carry, and whether the piece can be safely removed years from now.
Lacing is the archival gold standard for mounting cross stitch. The method involves wrapping your fabric around an acid-free board and lacing pH-neutral thread across the back in a tight grid pattern. This creates even tension across the entire piece without using any adhesives that could degrade the fibers over time. Lacing also permits fabric to expand and contract naturally with changes in humidity, which is critical for long-term preservation. For traditional samplers and heirloom pieces, lacing is the method professionals recommend most.
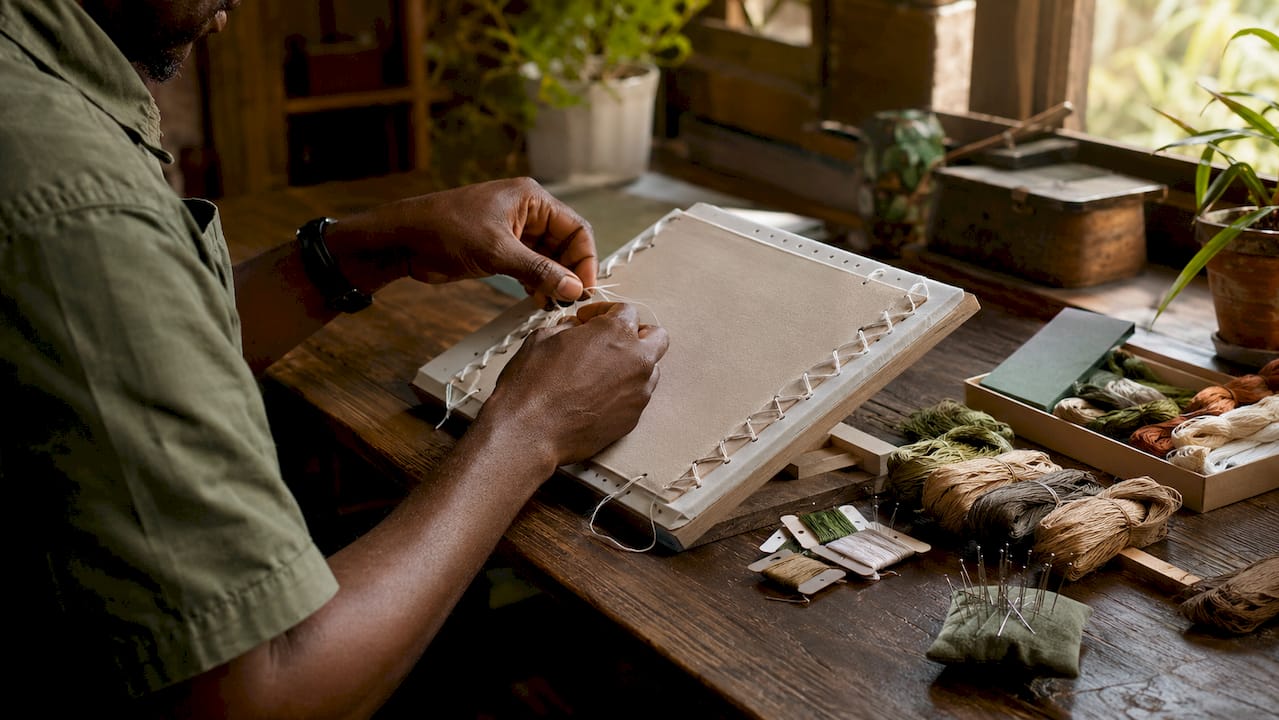
Hinging works differently. Instead of wrapping the fabric, you attach it to a backing board using small strips of Japanese tissue or archival tape along the top edge only. Hinging is preferred for lightweight or delicate textiles because it avoids the stretching tension that lacing applies. It also allows the piece to hang naturally and is a good choice for work with 3D embellishments like beads or raised stitches that could be flattened under tension. An added benefit is that hinging offers quicker removal, making it ideal for pieces that may be reframed or loaned for display.
Pinning is a third option, often used as a temporary or preparatory method. The key detail most crafters miss is that professionals use stainless steel pins inserted horizontally into the mounting board rather than standard sewing pins. Standard pins corrode over time and leave rust stains on fabric. Stainless steel pins hold tension cleanly and are safe for medium-term display.
Here is a quick comparison of the three methods:
- Lacing: Best for heavier pieces and heirloom work. Reversible, archival, and provides the most even tension.
- Hinging: Best for delicate or embellished pieces. Gentle, quick to remove, and allows natural drape.
- Pinning: Best for temporary mounting or works in progress. Use stainless steel pins only.
Pro Tip: Never use self-adhesive mounting boards for valuable needlework. Adhesives degrade over time and can permanently bond to your fabric, making future conservation nearly impossible.
How to choose the right frame and matting for your cross stitch project?
The frame and mat you choose set the visual tone for your finished piece. Getting these right means your stitching becomes the star of the wall, not an afterthought.
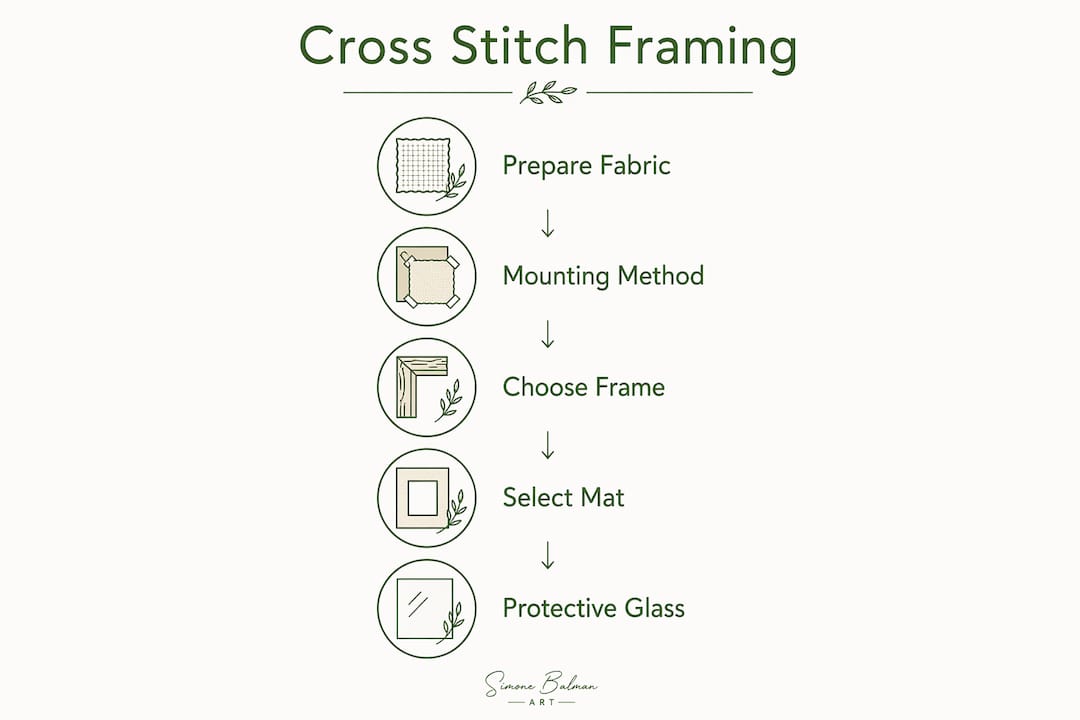
Frame style should reflect the heritage or modern aesthetic of the cross stitch design. Traditional samplers with floral borders and alphabet motifs look best in ornate wood or gold frames. Minimalist geometric designs or modern botanical patterns suit slim black or brushed metal frames. Matching the frame to the design’s personality creates visual harmony that feels intentional. You can explore how needle and design choices influence the overall aesthetic of a piece, which feeds directly into your framing decisions.
Mat boards serve two purposes: they protect the stitching and they add visual breathing room between the fabric and the frame edge. Professional mat widths range between 2 and 3 inches to provide sufficient balance and prevent the embroidery from touching the glass. A mat that is too narrow makes the piece feel cramped. A mat that is too wide can overwhelm a small design.
Choosing mat colors
Color selection is where many crafters make their biggest mistake. The instinct is to match the mat to the most dominant color in the piece, but that often creates a flat, one-note result. Choosing the third most prominent color from your artwork for the primary mat creates cohesion without overpowering the design. That subtle contrast draws the eye inward toward the stitching rather than stopping at the mat.
Double matting adds depth and a professional finish. A narrow inner mat in a contrasting color, paired with a wider outer mat, gives the piece a layered, gallery-quality look. This works especially well for detailed pieces like the Mediterranean Courtyard pattern where the color palette is rich and varied.
| Frame style | Best match |
|---|---|
| Ornate wood or gold | Traditional samplers, vintage florals, alphabet designs |
| Slim black or dark wood | Minimalist, geometric, or modern botanical designs |
| Natural wood or white | Scandinavian, coastal, or soft pastel designs |
| Brushed metal | Contemporary or graphic art-style cross stitch |
Pro Tip: Avoid choosing a frame color that matches your wall color exactly. The piece will visually disappear into the background. Aim for contrast between frame and wall to make your work stand out.
What are the best glass and protective covering options?
Glass is not optional for any piece you want to preserve long-term. It protects your stitching from dust, airborne pollutants, and the UV light that causes thread colors to fade.
UV-filtering museum glass blocks 99% of UV rays, making it the best choice for heirloom pieces or any work displayed in a room with strong natural light. The difference in thread color retention over a decade is significant. Standard glass offers basic protection but allows UV light to pass through, which gradually bleaches dyes in cotton floss.
Non-glare glass is worth considering for bright rooms where reflections make the piece hard to see. It diffuses light across the surface, reducing hotspots. The trade-off is a slight softening of the image, which can reduce the crispness of fine detail work.
Acrylic glazing is lightweight and shatter-resistant, making it a practical choice for large pieces or frames hung in high-traffic areas. The downside is that acrylic scratches more easily than glass and generates static, which can attract dust to the surface.
- Museum glass: Best for heirlooms and high-light rooms. Blocks 99% UV, minimal reflection.
- Standard glass: Affordable, clear, and suitable for low-light or casual display areas.
- ️ Non-glare glass: Good for bright rooms, but softens fine detail slightly.
- ️ Acrylic: Lightweight and shatter-resistant. Best for large or heavy pieces.
One detail that catches many crafters off guard: the air gap between your stitching and the glass is mandatory. When fabric touches glass directly, condensation can form between the surfaces, leading to mold and permanent fiber damage. A mat board or dedicated spacer creates this buffer. Standard off-the-shelf frames often lack the depth needed for textile mounting, so check the rebate depth before you buy.
Pro Tip: If you display a piece in a low-humidity room away from direct sunlight and it is purely decorative rather than an heirloom, you can skip glass entirely. Open display works well for hoop-framed pieces and adds a tactile, handmade quality to the presentation.
What alternative display methods exist for cross stitch projects?
Traditional picture frames are not the only way to show off your work. Several creative alternatives suit different project sizes, styles, and home décor preferences.
Hoop framing is the most popular casual option. You simply leave your finished piece in the embroidery hoop, trim the excess fabric, and hang it directly. Hoops come in wood, plastic, and bamboo, and they add a relaxed, handmade feel to any wall. The limitation is that hoops do not provide UV protection or archival mounting, so they work best for decorative pieces rather than heirlooms.
Shadow boxes are ideal for cross stitch pieces with dimensional elements like buttons, charms, or raised stitches. The deep frame creates space between the glass and the fabric, which solves the air gap problem naturally. Shadow boxes also let you display related objects alongside the stitching, such as a small photo or a spool of the thread used.
Stretcher bars give your cross stitch a canvas-style finish. You stretch the fabric over a wooden frame, similar to how oil paintings are mounted, and display it without glass. This works beautifully for bold, graphic designs where the texture of the fabric adds to the visual impact. The trade-off is that the piece is exposed to dust and UV light without any protective covering.
Here is a summary of alternative display options:
- Hoop framing: Casual, affordable, and easy. No UV protection. Best for decorative pieces.
- Shadow boxes: Great for 3D or embellished work. Natural air gap built in.
- ️ Stretcher bars: Canvas-style, no glass needed. Suits bold, graphic designs.
For a full overview of how these methods connect to other finishing choices, the cross stitch finishing techniques guide at Simone Balman Art covers the complete picture.
Pro Tip: Whatever display method you choose, use reversible techniques wherever possible. Your tastes will change, your décor will evolve, and a piece mounted with lacing or hinging can be reframed without any damage to the fabric.
Key Takeaways
The best framing method for cross stitch combines archival mounting, a properly sized mat, and UV-protective glazing to preserve your work and display it beautifully for years.
| Point | Details |
|---|---|
| Lacing is the top mounting method | Use pH-neutral thread and acid-free board for reversible, long-term preservation. |
| Mat width matters | A 2–3 inch mat border protects stitching from glass and adds visual balance. |
| Always create an air gap | Never let fabric touch glass directly; use a mat or spacer to prevent mold. |
| Match frame style to design | Traditional designs suit ornate frames; modern designs suit slim metal or black frames. |
| Choose mat color from the artwork | Pick the third most prominent color in your piece for the most cohesive mat choice. |
What I’ve learned from framing my own work
The single most useful thing I do before committing to a frame is hold physical samples directly against the stitched piece in natural light. Digital previews flatten colors and hide texture. A frame that looks perfect on a screen can look cold or heavy against the actual fabric. Take your finished piece to a frame shop and spend time with real samples.
The most common mistake I see is an undersized mat. Crafters often go narrow to save money or keep the piece looking large, but a thin mat makes the whole thing feel rushed. A generous mat width, at least 2 inches on all sides, gives the stitching room to breathe and signals that the work was worth the effort.
I also think the framing world undersells the joy of mixing traditional and contemporary elements. A classic sampler in a slim white frame with a pale linen mat looks fresh and modern without losing its heritage feel. You do not have to choose between old and new. The best frames often sit somewhere in between.
One last thing: reversibility is not just an archival concern. It is a practical one. Your home will change, your taste will shift, and the piece you frame today deserves the flexibility to be redisplayed in ten years without damage. Lacing and hinging both give you that freedom. Adhesives do not.
— Simone
Simone Balman Art tools to help you plan your framing
Planning your framing starts before you even pick up a needle. Knowing your finished fabric size, your border allowance, and your design dimensions means you can choose a frame and mat before the piece is complete, not after.
The fabric size calculator at Simone Balman Art helps you calculate exactly how much fabric you need, including the border margin required for lacing or matting. The pattern size calculator shows you the finished dimensions of any design at different fabric counts, so you can match your project to a standard frame size from the start. Simone Balman Art patterns are designed with clear, detailed charts that make it easy to plan your project with framing in mind from day one. Browse the full pattern collection to find a design that fits your space and style.
FAQ
What is the best mounting method for cross stitch framing?
Lacing is the best mounting method for most cross stitch pieces. It uses pH-neutral thread and an acid-free board to hold the fabric with even tension, without adhesives that can damage fibers over time.
How wide should a mat be for framing cross stitch?
A mat border of 2–3 inches is the professional standard. This width prevents the stitching from touching the glass and provides enough visual space to balance the design within the frame.
Does cross stitch need UV-protective glass?
UV-protective museum glass is strongly recommended for heirloom pieces or any work displayed in a bright room. It blocks 99% of UV rays, which significantly slows thread fading over time.
Can I frame cross stitch in a regular picture frame?
Standard frames often lack the depth needed for textile mounting. You will likely need to add spacers or choose a frame with a deeper rebate to create the required air gap between the fabric and the glass.
What is hoop framing and when should I use it?
Hoop framing means displaying your finished piece directly in the embroidery hoop. It is a casual, affordable option best suited to decorative pieces rather than heirlooms, since it provides no UV protection or archival mounting.


