

The fastest way to avoid thread tangling in hand stitching is to cut shorter lengths, separate your strands individually, and condition your thread before you even pick up the needle. Most tangles are not random. They come from predictable causes you can control.
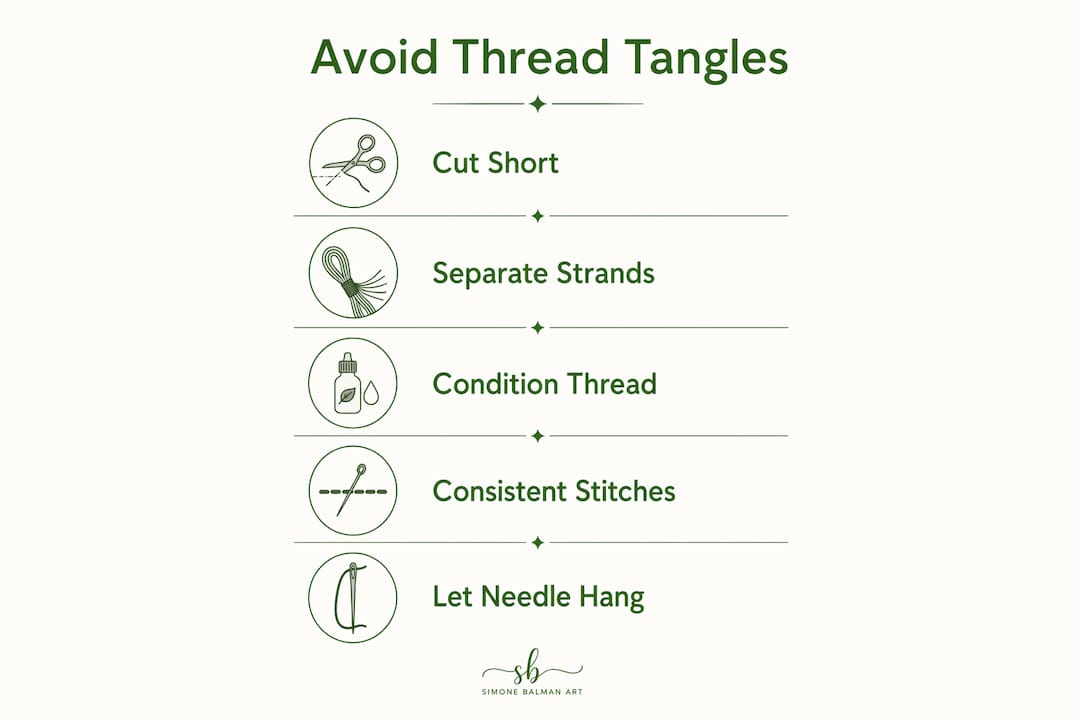
Here’s a quick-start checklist to keep your thread smooth from the first stitch:
- Keep thread lengths to a moderate hand-span length. Longer threads accumulate twist faster and fray more easily.
- Separate strands one at a time before recombining them for your stitch count.
- Run your thread through beeswax or a thread conditioner to reduce friction and static.
- Maintain consistent stitch direction and tension throughout your work.
- Let your needle dangle freely every few stitches to release built-up twist.
- Match your needle size to your thread so the eye doesn’t scrape or crimp the fibers.
These six habits alone will eliminate the majority of knots and tangles most stitchers deal with regularly.
How to avoid thread tangling: preparing your thread properly
Good thread preparation is where tangle prevention really begins. The way you pull thread from a skein, separate strands, and condition your floss before stitching makes a bigger difference than most people expect.
Start by pulling your thread from the bottom of the skein, at the long label end. Most manufacturers package embroidery floss this way specifically to prevent snarls. Pulling from the wrong end unravels the skein in a way that introduces twist before you’ve made a single stitch.

When you need to work with multiple strands, resist the urge to pull them out together. Pulling strands individually preserves each strand’s natural twist and prevents the microscopic kinks that cause knots later. Pull one strand at a time, let the remaining bundle settle, then recombine the number of strands your pattern calls for.
Threading technique also matters. Always insert the freshly cut end into the needle eye. That cut end has a clean, aligned fiber structure. Threading the other end reverses the thread’s natural twist and sets you up for tangles from the start.
Pro Tip: After separating your strands, hold both ends of the recombined thread and give it a gentle, smooth pull to straighten the fibers. This takes two seconds and noticeably reduces twist buildup as you stitch.
What thread length actually prevents tangles?
Thread length is one of the most overlooked tangle solutions. Sewing experts recommend thread lengths of 18–20 inches for hand stitching, with 20 inches as a comfortable upper limit. A practical way to measure this is fingertip to elbow.
Longer threads are tempting because they reduce how often you re-thread. But every inch of extra length adds more surface area for friction, more opportunity for twist to accumulate, and more chance of the thread catching on itself or the fabric. The fuzziness you sometimes see on thread toward the end of a long length is a direct result of that repeated friction.
Shorter lengths mean re-threading more often. That’s a fair trade. Re-threading also gives you a natural reset point, clearing any accumulated twist before it compounds into a knot.
- Cut to a manageable length appropriate for hand sewing and embroidery.
- For metallic or delicate threads, go shorter, around 12–15 inches.
- Re-thread regularly rather than pushing a length until it frays.
- Measure by feel: fingertip to elbow is a reliable, no-ruler method.
Stitching techniques that stop thread from twisting
The way you move the needle through fabric directly affects how much twist builds up in your thread. Each stitch adds a small amount of torque. Over time, that torque compounds into a corkscrew effect that eventually knots.

Consistent stitch direction is your first defense. When you change direction frequently or angle your needle inconsistently, you introduce twist from multiple directions at once. Keeping your stitches aligned and your needle angle steady lets the thread feed smoothly without fighting itself.
Every few stitches, pause and let your needle hang freely. The thread will untwist on its own as it dangles. This simple reset takes only a moment and prevents the spiral effect from ever getting out of hand. Hand quilters often take this further by rolling the needle slightly between their fingers in the opposite direction of the thread’s twist as they stitch.
Pull the thread through fabric smoothly and steadily. Yanking creates sudden tension spikes that tighten any existing twist into a knot almost instantly. Think of guiding the thread rather than pulling it.
Pro Tip: If you notice your thread starting to spiral, don’t wait for a knot to form. Let the needle dangle immediately. Catching the twist early takes seconds. Untangling a knot takes minutes.
- Maintain even tension throughout each stitch.
- Keep your needle angle consistent, especially on long seams.
- Avoid reversing stitch direction unnecessarily.
- Match needle size to thread count so the eye doesn’t abrade the fibers.
Proper anchor stitch technique at the start and end of each thread also reduces the loose tail tangles that can catch on the back of your work.
Do thread conditioners actually help?
Yes, and the difference is noticeable. Most experienced sewers use thread conditioners regularly to reduce friction and knotting during hand stitching. The coating helps thread glide through fabric instead of catching on fibers, and it reduces the static electricity that causes threads to cling and tangle.
Beeswax is the classic choice. Run your thread through a beeswax block two or three times, then pull it between your thumb and finger to remove any excess. For extra hold, wrap the waxed thread in a scrap of muslin and press it briefly with a warm iron. The heat sets the wax into the fibers. One thing to watch: beeswax can leave a residue on some delicate fabrics, so test on a scrap first.
Thread Heaven is a popular synthetic alternative that conditions without staining. It comes as a small hard gel square; you press the thread into it as you pull through. It offers the same anti-static and smoothing benefits as beeswax without the stickiness some stitchers find off-putting.
A household option worth trying: fold a dryer sheet in half and run your thread through it a couple of times. The anti-static properties genuinely help, especially with synthetic threads.
- Apply beeswax or conditioner before threading the needle, not after.
- A light coat is enough. Over-conditioning makes thread too slippery to hold stitches well.
- Thread conditioners are especially useful for metallic and rayon threads, which tangle easily.
- Test any product on a fabric scrap before using it on your main project.
Quick fixes and troubleshooting when tangles happen
Even with good habits, tangles occasionally appear. How you respond matters as much as prevention.
Stop the moment you feel resistance. Continuing to pull a snagged thread tightens the knot and can break the fiber entirely. Set down your work and look at both the front and back before doing anything else.
Use a needle or fine pin to gently work the knot loose. Slide the tip into the center of the knot and ease the loops apart gradually. Patience here pays off. Rushing causes the thread to snap.
- If the knot loosens, smooth the thread between your fingers and check for kinks before continuing.
- If the knot is too tight to release, cut the thread and re-thread cleanly. A fresh start is faster than fighting a stubborn tangle.
- Check the back of your work periodically. Knots accumulate there without you noticing until they pull through to the front.
- Keep a small pair of embroidery scissors nearby so you can cut and re-thread quickly when needed.
Choosing the right thread for your fabric also reduces how often tangles occur. Polyester threads resist tangling well and suit most general projects. Cotton threads like DMC cotton floss are softer and give a beautiful finish but need careful handling. Thicker threads tangle less than fine ones, though they’re not suitable for every fabric weight.
What experienced stitchers know about thread twist mechanics
Thread twist is not random. It accumulates mechanically, and understanding how it works helps you manage it before it becomes a problem.
Every time you push the needle through fabric and pull the thread, the needle rotates slightly. That rotation adds a small amount of twist to the thread. Stitch after stitch, in the same direction, and that twist compounds. The result is a thread that corkscrews, then loops, then knots.
Managing thread twist is really about maintaining thread integrity throughout the stitching process. The goal isn’t just to untwist when things go wrong. It’s to stitch in a way that prevents excessive twist from building up in the first place. Proactive needle angle management and consistent stitch direction are more effective than reactive dangling.
Excessive needle dangling to untwist thread can actually cause fiber wear over time. The better practice is to monitor your needle rotation and stitch direction so twist doesn’t accumulate to a level that requires aggressive correction. Think of it as thread maintenance woven into your stitching rhythm rather than a rescue operation.
Separating strands individually, as covered earlier, also protects thread structure at a microscopic level. Each strand in a six-strand floss like DMC cotton floss has its own twist direction. Pulling multiple strands out together disrupts those individual twists and creates micro-kinks that become knots later in the project.
How does your environment affect thread tangling?
Your stitching environment plays a quieter role in thread behavior than technique does, but it’s worth paying attention to.
Humidity is the main environmental factor. High humidity causes cotton and linen threads to absorb moisture, which makes them swell slightly and grip fabric more tightly. That extra friction increases the chance of snagging and tangling. Stitching in a dry, climate-controlled room generally produces smoother thread behavior. If you live in a humid climate, storing your threads in a sealed container with a small silica gel packet helps keep moisture out.
Fabric type affects how thread feeds through the weave. Loosely woven fabrics like evenweave linen allow thread to pass through easily. Tightly woven or textured fabrics create more resistance, which amplifies any existing twist in the thread. When working on a challenging fabric, shorten your thread length and condition it more thoroughly before starting.
Static electricity builds up more in dry conditions and with synthetic fabrics. This is where dryer sheets and thread conditioners earn their place, since both reduce static cling that causes threads to stick to each other and to the fabric surface.
How should you store thread to prevent tangles before you stitch?
Pre-stitching tangles are almost entirely a storage problem. Loose skeins left in a bag or basket will tangle with each other every time you reach in.
Winding embroidery floss on bobbins and pulling from the manufacturer’s designated end prevents snarls and kinks before you even begin stitching. Plastic or cardboard bobbins are inexpensive and keep each color separate and tidy. Label each bobbin with the DMC color number so you can find what you need without unraveling everything.
Other storage options that work well:
- Floss holders (plastic, various shapes) keep individual colors organized and tangle-free.
- Hanging organizers let you group threads by color family, as long as they’re stored away from drafts.
- Zip-close bags with one color per bag work well for travel projects.
- Thread rings hold cut lengths ready to use, which is handy for ongoing projects.
Pull thread from the correct end every time. Pulling from the wrong end unwinds the skein against its manufactured twist, introducing tangles before the thread even reaches your needle. For variegated floss, this matters even more since the color sequence also depends on pulling from the right end.
Ready to put tangle-free stitching into practice? Simone Balman Art offers a beautiful collection of modern cross stitch patterns designed with clear charts and enjoyable stitching experiences in mind. Whether you’re new to the craft or looking for your next project, there’s something for every stitcher.

Key Takeaways
Keeping thread tangle-free comes down to three habits: cut shorter lengths, separate strands individually, and condition your thread before you start.
| Point | Details |
|---|---|
| Optimal thread length | Cut to 18–20 inches to limit twist buildup and reduce friction during stitching. |
| Strand separation | Pull each strand out individually to preserve natural twist and prevent micro-kinks. |
| Thread conditioning | Run thread through beeswax or a synthetic conditioner to reduce friction and static. |
| Needle dangling | Let the needle hang freely every few stitches to release accumulated twist before it knots. |
| Thread storage | Wind floss on labeled bobbins and pull from the manufacturer’s designated end to prevent pre-stitching tangles. |
FAQ
How do you stop thread from tangling while hand sewing?
Cut your thread to 18–20 inches, condition it with beeswax or a thread conditioner, and let your needle dangle every few stitches to release twist. Threading the freshly cut end through the needle eye also preserves the thread’s natural twist and reduces knotting.
Why does my embroidery thread keep twisting when I cross stitch?
Each stitch adds a small amount of torque to the thread as the needle rotates through the fabric. Consistent stitch direction compounds this twist over time, so pausing to let the needle dangle freely and monitoring your needle angle are the most effective ways to manage it.
What causes thread to bunch up and form knots?
Thread bunches when accumulated twist tightens into a loop, usually from using too long a thread length, pulling strands together instead of individually, or stitching with inconsistent tension. Yanking the thread through fabric instead of pulling it smoothly also triggers sudden knots.
Does beeswax really help prevent thread tangles?
Yes. Running thread through a beeswax block coats it with a thin layer that reduces friction and static electricity, both of which contribute to tangling. It also strengthens the thread, making it more resistant to the wear that comes from repeated passes through fabric.
How should I store embroidery floss to avoid tangles?
Wind each color onto a labeled bobbin and pull from the manufacturer’s designated end when you’re ready to stitch. Keeping colors separated in individual bags or on a floss organizer prevents them from catching on each other between stitching sessions.


